
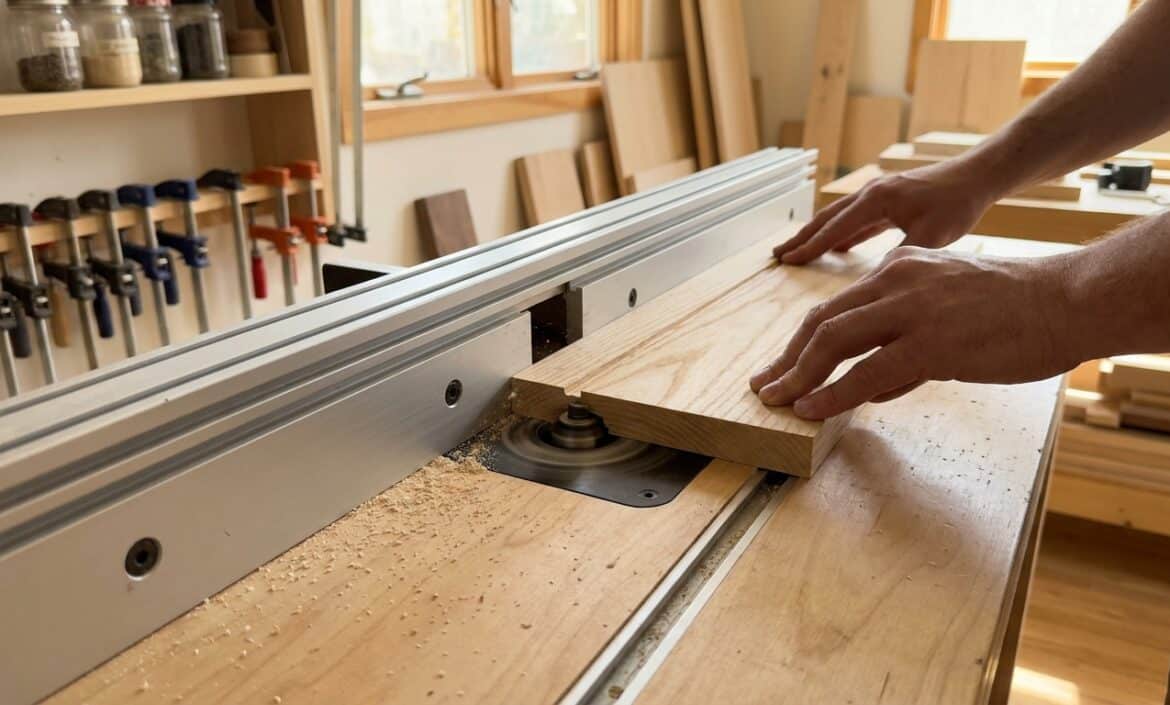
A router table is one of the most useful tools in any woodworking setup. Whether you are building shelves, cutting grooves for cabinet panels, or shaping edges on custom furniture, the router table gives you the control and stability that a handheld router cannot always offer.
If you have never used a router table before, or you have one sitting in your workshop but you are not confident using it, this guide covers everything you need to know. We will walk you through how the router table works, how to feed your workpiece safely, how to set up the fence, and the safety rules you should never skip.
At BHMS Home Maintenance, our carpenters in Dubai use router tables daily for custom cabinet work, wardrobe fittings, shelving, and edge profiling in apartments and villas. This guide is based on what we teach new team members before they touch the machine.
In This Guide
- ▶ What Is a Router Table and Why Use One?
- ▶ The Most Important Rule: Feed Direction
- ▶ How to Set Up the Fence for Different Cuts
- ▶ Cuts You Can Make With a Router Table
- ▶ How to Use a Featherboard for Small Pieces
- ▶ Router Table Safety Tips You Should Never Ignore
- ▶ When to DIY and When to Call a Carpenter
- ▶ Frequently Asked Questions
What Is a Router Table and Why Use One?
A router is a power tool that spins a cutting bit at high speed to shape wood. It can create grooves, rebates, slots, and decorative moldings. Most people use a router as a handheld tool, holding it on top of the workpiece and guiding it along.
A router table flips this setup. The router is mounted upside down underneath a flat table surface, with the cutting bit poking up through a hole. Instead of moving the router over the wood, you move the wood over the router.
Why does this matter? Because the table gives you a large, stable surface to work on. With a handheld router, you are balancing a spinning tool on top of your workpiece, and on narrow or small pieces, it can tip off the edge. A router table removes that risk. You get more control, more stability, and cleaner cuts, especially on edge profiles, grooves, and small components like trim pieces and molding strips.
The Most Important Rule: Feed Direction
This is the first thing you need to understand before you turn the machine on. Get this wrong and the workpiece can be pulled from your hands and thrown across the room.
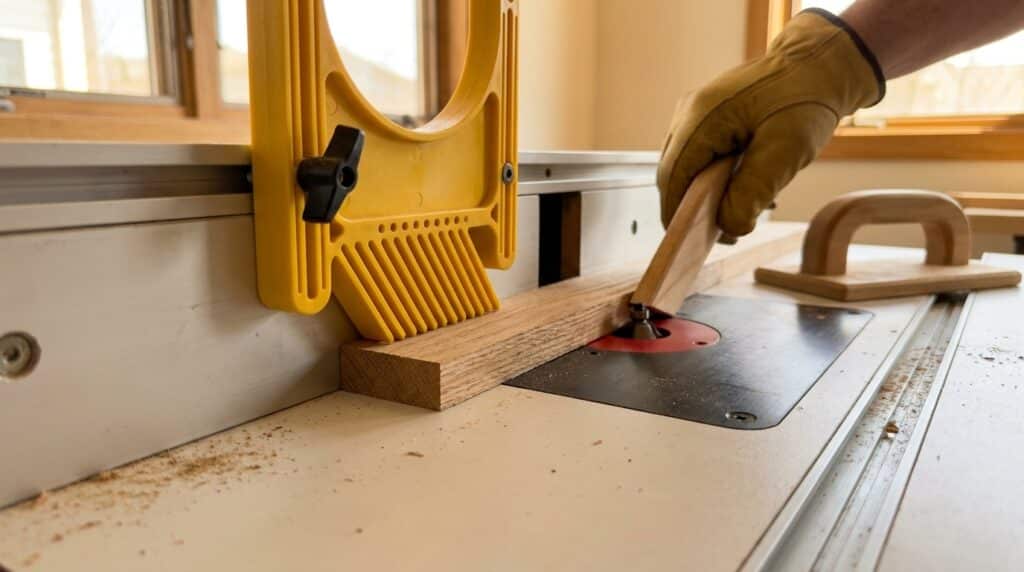
When a router is mounted in a table, the bit spins in an anticlockwise direction (when viewed from above). You must always feed your workpiece from right to left along the table. This means you are pushing the wood against the direction of the cutter, which gives you control over the cut and keeps the workpiece pressed firmly against the fence.
If you feed the wood in the same direction the cutter is spinning (left to right), the bit will grab the wood and catapult it forward. This is called a kickback, and it is one of the most common causes of injury with a router table. Always right to left. No exceptions.
How to Set Up the Fence for Different Cuts
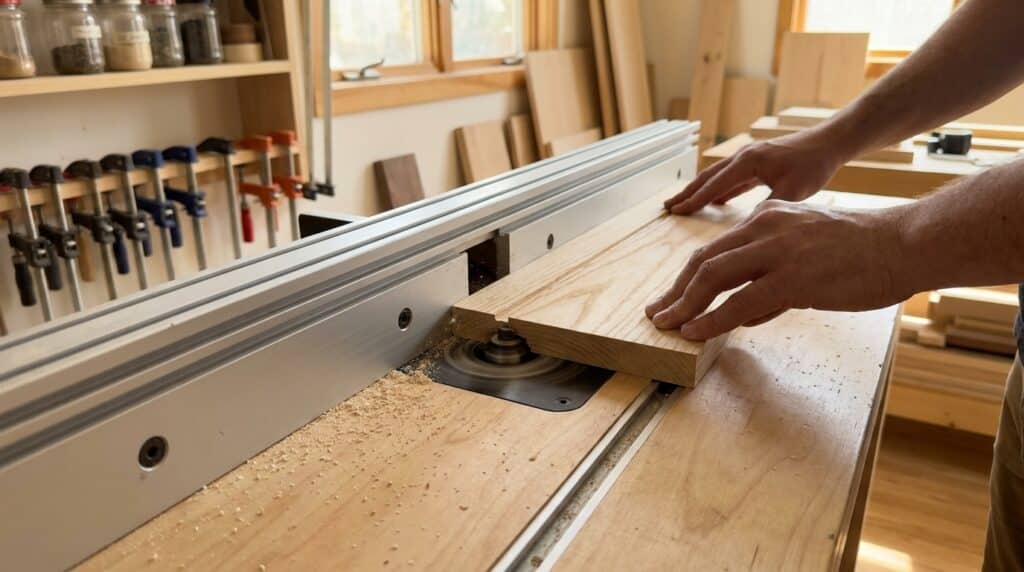
The fence is the straight guide that runs across the router table. Your workpiece slides along it while the cutter does its work. Setting the fence correctly determines where and how deep the cut will be.
For grooves and rebates: Use a straight cutting bit (twin flute works best). Set the depth of the bit first, then adjust the fence to control how far from the edge of the board the groove will be. Lock the fence in place, run a test piece through, and adjust if needed before cutting your actual workpiece.
For guided bits (round overs and edge profiles): These bits have a small bearing on them that rides along the edge of the wood. If the edge you are profiling is straight, you can still use the fence for extra stability. Align the fence so it sits flush with the bearing on the bit. Use a straight edge to check the alignment, then lock the fence.
For curved or irregular edges: If your workpiece has curves, you cannot use the fence. Move the fence back out of the way but keep it close enough so the dust extraction still picks up most of the waste. The bearing on the guided bit will follow the curve of the wood and control the cut depth on its own.
Cuts You Can Make With a Router Table
The router table is incredibly versatile. Here are the most common cuts our carpenters make with it on a daily basis:
Grooves: A channel cut into the face of a board, used for panel inserts in cabinet doors and drawer bottoms. A straight bit and the fence are all you need.
Rebates: A step cut into the edge of a board. Used for joining panels, fitting backs onto cabinets, and creating overlapping joints. Same setup as a groove, but the bit is positioned at the edge of the board rather than the middle.
Round overs: Rounding off the sharp edge of a board for a smooth, comfortable finish. Common on shelves, table edges, and handrails. Use a round over bit with a bearing.
Edge profiles: Decorative shapes cut into the edge of a board. Used on door frames, skirting boards, and furniture trim. Dozens of profile bits are available to create different designs.
Slots: Narrow channels cut for joining pieces together or for fitting hardware. The router table makes these precise and repeatable.
How to Use a Featherboard for Small Pieces
When you are working with narrow or small pieces of wood, holding them firmly against the fence while pushing them past the cutter can be difficult and dangerous. Your fingers end up too close to the spinning bit.
This is where a featherboard helps. It is a piece of plastic or wood with flexible fingers that clamp to the table and press against the side of your workpiece. Once set up, the featherboard holds the wood tight against the fence while you push it through with a push stick instead of your hands.
You can also position a featherboard to apply downward pressure, keeping the workpiece flat against the table surface. This is especially useful when cutting grooves in thin boards that tend to lift during the cut.
Router Table Safety Tips You Should Never Ignore
A router bit spins at speeds between 10,000 and 25,000 RPM. It will cut through fingers just as easily as it cuts through wood. These are not suggestions. They are rules:
Always feed right to left. Feeding in the wrong direction causes kickback. This is the number one cause of router table injuries.
Use push sticks and push blocks on small pieces. If your fingers would be within a few inches of the cutter, use a push stick to guide the workpiece instead. Keep your hands out of the cutting zone at all times.
Use dust extraction. Router cutting produces a large amount of fine dust, especially when cutting grooves where the waste has nowhere to escape. Connect a shop vac or dust extractor to the fence port. This also improves visibility so you can see the cut as it happens.
Make multiple passes for deep cuts. Do not try to remove a large amount of material in one pass. Raise the bit in small increments and make several passes. This reduces strain on the motor, gives a cleaner finish, and is much safer.
Never start the cut with the workpiece touching the bit. Position your workpiece against the fence, away from the cutter, then slide it into the spinning bit. Starting with the wood already in contact with the cutter can cause it to grab and kick.
Wear eye protection and hearing protection. Routers are loud and throw small chips. Safety glasses and ear protection are not optional.
When to DIY and When to Call a Carpenter
A router table is a great tool for DIY woodworking projects at home. Simple edge rounding, basic grooves, and straight rebates are all manageable for a beginner with patience and the right safety setup.
But some jobs are better left to a professional carpenter. Custom kitchen cabinet doors with routed panel grooves, built in wardrobe detailing, precision joinery for furniture, and decorative moldings that need to match existing trim all require experience and the right combination of bits, jigs, and technique.
If you are in Dubai and need custom woodwork for your apartment or villa, our carpentry team at BHMS Home Maintenance handles everything from kitchen cabinet installation and wardrobe fitting to custom shelving and furniture repair. We bring our own tools and workshop capability to your home.
You can see our full range of services on our carpentry services in Dubai page.
Frequently Asked Questions
What can you do with a router table?
A router table can cut grooves, rebates, slots, decorative edge profiles, and round overs. It is used for cabinet making, furniture building, door frame detailing, and any woodworking task that requires precise, repeatable cuts along the edge or face of a board.
Which direction do you feed wood on a router table?
Always feed your workpiece from right to left. The router bit in a table spins anticlockwise, so feeding from right to left pushes the wood against the cutting direction. This gives you control and prevents dangerous kickback.
Is a router table safer than a handheld router?
In most cases, yes. The router table provides a large flat surface and a fence to guide the workpiece, making it more stable than balancing a handheld router on top of the wood. However, it still requires proper technique, push sticks for small pieces, and correct feed direction to be used safely.
What is a featherboard used for on a router table?
A featherboard is a clamped accessory with flexible fingers that hold your workpiece firmly against the fence or flat against the table while you push it through the cutter. It is essential when working with narrow or small pieces where your hands would otherwise be too close to the bit.
Can I build my own router table?
Yes. A basic router table can be made from a flat piece of MDF or plywood with the router mounted underneath. Many woodworkers build their own to save money and customize the setup. You can also buy ready made router tables, though they tend to be more expensive.
Do I need a router table for home carpentry projects?
For simple tasks, a handheld router is enough. A router table becomes useful when you need consistent, repeatable cuts, when you are working with small pieces, or when you want cleaner edge profiles. If you are doing cabinet work or furniture building regularly, a router table is worth the investment.
Need Custom Woodwork in Your Dubai Home?
Whether it is kitchen cabinets, built in wardrobes, custom shelving, or furniture repairs, our carpentry team at BHMS Home Maintenance delivers professional woodwork across Dubai apartments and villas. We handle everything from measurement to installation.
📞 052 545 7205 | 💬 WhatsApp Us — we reply within 15 to 30 minutes, any time of day.
BHMS Home Maintenance provides professional carpentry services in Dubai, plus painting, handyman, plumbing, and renovation services for apartments, villas, and offices across the city.


How to Program a Garage Door Opener | in 5 Simple Steps
[…] How to use a router table […]